Transform Your Garden with Artificial Grass: Step-by-Step Installation Guide
Posted on by James Higgins

Artificial grass has become a hugely popular option for UK homes. The latest product innovations and trends in artificial grass mean that it’s possible to transform your outside space for less, with realistic, family-friendly greenery that offers no mess, no mud, and no mowing.
It’s possible to keep costs down further by installing your artificial lawn yourself. If you’d like to learn how to install artificial grass, Grass247’s handy DIY artificial grass installation guide will walk you through the process. Read on to find out if installing your own faux lawn is the best option for you, and what you’ll need before you get started.
Why Choose Artificial Grass for Your Garden?
If you love the look of a luscious green lawn, but don’t enjoy the upkeep, then artificial grass could be a fantastic option for your outdoor area. It’s low-maintenance, never needs mowing or reseeding, and can save both time and water. It’s ultra durable, with no more muddy footprints, and can be laid in areas where grass struggles to grow. Grass247’s range is also pet-friendly, easy to keep clean, and means the garden can be used all year round. What’s more, artificial grass installation can be fairly straightforward, either by employing a professional installer or doing it yourself once you know how.
Benefits of Artificial Grass Over Real Grass
One of the biggest benefits of artificial grass vs real grass is that it’s versatile, tough, and looks fantastic in all seasons. It’s a cost-effective, low-maintenance, evergreen option that is drought-proof, great for landscaping, and will never need mowing or fertilising. Fake grass installation is ideal for smaller spaces through to larger gardens, and can be laid in shady spots or full sun. Perfect for homes with pets and children, fake grass is soft underfoot, tough and hard-wearing, and can look truly lifelike with minimal effort to maintain it. We stock a wide range of realistic artificial grass for relaxation and leisure lawns, to children’s play areas, balconies, outdoor pet areas, or even rooftop terraces.
Is Artificial Grass Right for You?
Faux grass is great for shaded spots, poor soil, and places where real grass struggles to grow. Whether your yard is shady, stony, or south-facing and sunny, artificial grass could be an ideal solution. If you’d like the look of a lush lawn but without all the work, or you’d like to create a striking landscaped look in a small garden, artificial grass could be your best bet. It’s also perfect for homes with pets, as it’s strong and easy to keep clean, and with the correct artificial grass installation and drainage setup, it can keep your outdoor space mud-free with a reduced risk of flooding during rainy weather.
Tools and Materials You’ll Need for DIY Artificial Grass Installation
Before mastering how to install artificial grass in your own garden, there are a few key tools and materials you’ll need to make sure that your faux lawn is installed safely and correctly, has adequate drainage, and will last for many years to come. You’ll also need to prepare the area in advance, removing any existing turf or stones, and level your garden if needed.
Essential Tools Checklist
- Tape measure
- Wheelbarrow
- Hammer/mallet
- Spade
- Spirit level
- Rake
- Broom
- Hose
- Hired compacting plate (if levelling your lawn yourself)
- Cutting knife
- Carpet knee kicker (optional)
- PPE
-
Joining tape/adhesive
-
Pegs/pins
-
Underlay/shockpad
-
Weed membrane/drainage membrane
- Coarse aggregates
- Grit sand (5mm diameter max)
- Your choice of artificial grass
Don’t forget, as well as an outstanding range of artificial grass, Grass247 also stocks essential accessories, whether you’re installing your lawn yourself or hiring a professional.
Recommended Base Materials
Before starting your fake grass installation, it’s vital to prepare the base correctly. This keeps the faux turf stable, assists with drainage, prevents flooding, and helps your lawn look smooth and sleek. You could lay a sheet of drainage membrane directly above the subsoil. Apply a layer of coarse aggregates or crushed limestone directly on top of this membrane, if required, followed by a layer of Grit sand. Some installers may suggest using a basic weed membrane on top of the sand layer. However, we recommend using our multipurpose weed-proof drainage and stabilisation membrane.
Safety Gear to Consider
When learning how to install artificial grass yourself, it’s important to consider PPE. We’d recommend work boots, eye protection, tough gloves, and knee pads. If you’re hiring heavy machinery, you may need additional safety equipment, which the hire company will be able to recommend.
DIY Artificial Grass Installation Guide: Step-by-Step

Revamp your outdoor space for less with our step-by-step DIY artificial grass installation guide. Our Measuring and Fitting Guide also has some top tips. Remember, our friendly team is happy to give you advice on the materials you’ll need, so don’t hesitate to contact us before, during or after your installation if you have any questions.
Step 1 – Measure and Clear the Area
First, you’ll need to measure the space and clear any existing lawn, stones or debris. Prior to installation, it is essential that you accurately measure the area to be covered, across the widest parts of the garden, and add at least 100mm to each dimension to ensure sufficient coverage and to allow for trimming.
Any existing lawn must be removed along with a layer of soil down to a depth of at least 100mm. Level out the whole area and pre-compact the subsoil with a vibrating compaction plate (these are readily available for hire). Any falls in height or slope levels should run away from your property, or to the sides.
Step 2 – Install a Sub-Base Layer
After removing the old lawn and any stones and thoroughly flattening the area, apply a drainage membrane layer followed by a layer of coarse aggregates (or crushed limestone) directly on top. You may wish to add some edging around the lawn area, too.
Step 3 – Add and Compact the Base
Level and re-compact the sub base thoroughly before spreading a thin layer of Grit sand (or Granite Dust) and flattening again. By giving the base layer some attention, it’ll support the drainage of your lawn, as well as keep it firm underfoot without having unsightly bumps on the surface.
Step 4 – Fit a Weed Membrane
You can now add a weed membrane over your compacted base to help prevent weeds and unwanted plants from growing through and disrupting the aesthetic of your new artificial lawn. The textile membrane prevents light from reaching the weeds and blocks their growth without the need for chemicals. This water-permeable membrane allows water to pass through easily to drain away.
Before continuing with your fake grass installation, it’s often recommended to add an underlay beneath the faux lawn, which helps the surface feel soft and comfortable underfoot.
Step 5 – Cut and Lay the Artificial Grass
Here comes the exciting part – laying the artificial turf! Position your artificial grass, ensuring that the pile is running in the same direction. For best results, have the pile pointing towards your property. If your area requires multiple sections of grass, ensure all sections are laid out with a matching pile direction.
Step 6 – Trim and Join the Edges
You can trim longer sections to fit your space by carefully cutting the turf with your knife. To join different sections, place both edges together, carefully fold back each piece and lay a full-length strip of sealing tape along the joint to prevent water ingress. Apply the adhesive to the tape and lay the grass back over the tape.
Step 7 – Secure and Finish the Edges
Hammer in ground pins, spacing every 20cm around the perimeter, to fix the grass into place. (It’s possible to use special staples or galvanised nails, alternatively.) At Grass247, we stock a selection of pins for artificial grass available to help you properly fit your artificial lawn. Then use a sharp knife to trim until the edges look neat and tidy. The grass fibres are attached to the backing in rows, meaning you can cut underneath the pile to allow the grass fibres to cover the backing.
Step 8 – Brush and Enjoy Your New Lawn
Finally, you’ll just need to brush your new lawn with your broom to remove any loose off-cuts and debris, and get the fibres facing the same way, for a realistic finish. If you’re using infill, this will be the final stage of the process. It’s recommended to leave the lawn in place for up to 24 hours to ensure all adhesives have dried, and then your new outdoor area is ready to be enjoyed.
Common Mistakes to Avoid During Fake Grass Installation
You may feel fairly confident with fitting your artificial lawn yourself, but if it’s your first time, there are a few common mistakes that can lead to less-than-perfect results. Knowing these in advance can help you avoid certain hiccups along the way. These include:
Poor Drainage Preparation
Correctly installing your sub base layer supports effective drainage, which is essential to maintaining your artificial lawn’s appearance, functionality, and longevity. Without this, issues such as water pooling, mould growth, subsidence, and damage can become real problems.
Uneven Surfaces and Lumps
The secret to fitting artificial grass perfectly is to ensure the base is properly flattened and level, and that your faux turf has no overlaps and no unkempt edges. Taking time to flatten each layer and trim the turf carefully will benefit the overall look and feel of your lawn.
Skipping the Weed Membrane
It may be tempting to skip the weed membrane layer, but one of the many benefits of artificial grass is that it’s low-maintenance. Without the weed membrane, weeds will quickly start to pop up, ruining your smart aesthetic and leading to lots of additional weeding needed.
Inadequate Joining and Fixing
Careful joining and fixing keep your lawn safe for the family and pets to use, as any loose edges can become trip hazards. If you’re opting for realistic fake grass, this will also affect your aesthetic and may allow animals and pests to burrow underneath. By carefully joining and trimming edges, your lawn will look its best for longer.
How to Maintain Your Artificial Grass After Installation
Artificial grass is famously simple to maintain if it’s installed correctly. It’s best to brush the lawn weekly to remove any debris, and clean away any solid waste or spills which pets and kids might leave. You may need to pull up the occasional weed which breaks through, or do some quick maintenance after heavy rain, but you can say goodbye to having to mow or fertilise your lawn forever!
Regular Brushing and Cleaning Tips
Here are our top tips for cleaning and caring for your new fake grass:
- Use a stiff broom frequently to brush the fibres in the same direction
- Use a rake or leaf blower to remove leaves and fallen branches weekly
- Use an enzyme cleaner to remove any pet waste to keep your lawn odour-free
- Wash away light dust and pollen using your garden hose every now and then

Preventing Weeds and Debris Build-up
By brushing away debris, you can help prevent unwanted seedlings and sticks from upsetting the look of your perfect lawn. You may be able to use a chemical weed killer for any weeds which manage to break through, or simply pull them up if they appear. You can also use an artificial grass-friendly cleaning solution to get your fibres looking fabulous again after severe weather.
Dealing with Pets and Spills
It’s best to clean up pet mess and other spills as soon as possible, to prevent damage to your lawn and to keep it smelling fresh. After scooping up any solid mess, you can use a pet-friendly cleaner to cleanse and deodorise any accidents. Many brands of faux turf are stain and UV-resistant, to maintain their evergreen appearance year-round, but by cleaning up pet waste promptly, you can help your lawn to last and last.
DIY Artificial Grass Installation vs. Hiring a Pro
While some people hire a fitter to do the hard work, others prefer to roll up their sleeves and have a go at fitting it themselves. If you have a larger garden, have some complex landscaping plans, or you’re not feeling confident in mastering how to install artificial grass, we always recommend speaking to a fitter for advice or booking; their expertise is invaluable. Although this will add additional costs to your project, using an experienced fitter will help to get the best finish for your faux lawn.
When to Consider Professional Installation
If you’re worried about how to fit artificial grass, find a local professional. To find a fitter in your local area, ask for recommendations from others, or you can search Yell. They often have a star rating system and reviews, so you can find a trustworthy fitter in your area.
Cost Comparison and Considerations
The cost of professional installation varies depending on your location, as well as the size and complexity of the project. You could keep costs down by removing the old turf yourself and levelling the lawn, or you may prefer to hire an experienced landscaper to do it all. For advice on how to fit artificial grass, you can also speak to one of our flooring experts via email, live chat or by calling 0800 0599 247 – we're happy to help!
Transform Your Outdoor Space with Confidence
By installing your artificial lawn yourself, you can keep costs down and get the look you want for less. For more experienced DIYers, you could create exciting and innovative landscaping effects, and by following our guide and installing your own faux lawn, you can enjoy peace of mind that your solid base and effective drainage system will keep your lawn looking great all year round.
Say goodbye to the tedious tasks of lawn care and welcome the beauty of low-maintenance artificial grass in your outdoor space. Choose from a range of pile heights to achieve your desired aesthetic and texture, from the established look of a mature lawn to that freshly cut appearance. Start your garden re-vamp and buy artificial grass from Grass247 today to transform your space into an oasis of beauty, convenience, and durability.
You may also like
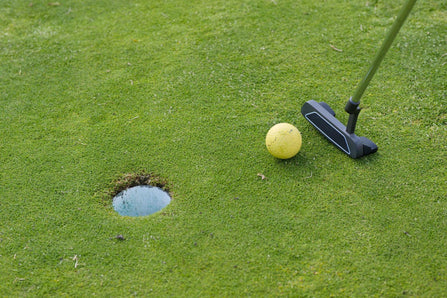
How to Create a Garden Putting Green at Home
For any golfer, the short game is where rounds are won and lost. And while you can't exactly fit a par-72 course in your back garden, a home putting green is well within reach for most UK homeowners. It's one of those projects that sounds...
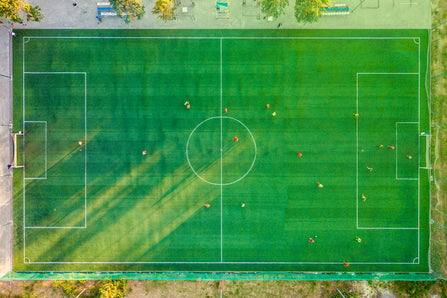
Exploring the Benefits of Artificial Grass for Sports Fields in the UK
One of the most exciting innovations for modern outdoor recreation facilities is next-generation artificial grass for sports fields. From artificial turf for football pitches to artificial sports turf for playgrounds, leisure centres, sports clubs, and community facilities, high-performance and ultra-durable artificial grass capability stretches far...
Heat-Resistant Artificial Grass: Staying Cool Under the UK Sun
Even in the UK, we’re starting to see warmer temperatures, more heatwaves, and the increased risk of drought from spring to late summer. It’s becoming increasingly popular to install heat-resistant artificial turf in your garden or outside space, which is both low maintenance and needs...